Saturday, July 27, 2013

Pasta Salad with Cilantro Lime Vinaigrette

Want a deliciously different pasta salad?  The cilantro lime vinaigrette in this salad is a refreshing change from Italian pasta salads.  This recipe is an adaptation from a local restaurant that you will want to add to your menu!  You can make this salad a main dish if you would like by adding cooked shrimp or chicken.  This is one of our favorite salads at our house!


Pasta Salad with Cilantro Lime Vinaigrette

      Salad:
      8 oz farfalle or bow tie pasta                      1 c julienned carrots
      1 Tbsp olive oil                                         1 c  julienned red bell pepper
      2 Tbsp minced fresh parsley                      1 c julienned green bell pepper
      2 Tbsp minced fresh cilantro                      1 basket cherry tomatoes, halved
      2 Tbsp minced scallions                            1 lb salad cooked shrimp or chicken (opt)
            
      Cilantro Lime Vinaigrette:
       3 cloves garlic, minced                               ¼ c white wine vinegar
       ¼ c minced cilantro                                    1 tsp salt
       2 Tbsp Dijon mustard                                 ½ tsp pepper
       juice & zest of 1 lime                                  2/3 c canola oil            


Cook the pasta al dente using package directions.  Rinse under cold water and drain well.  Toss with olive oil in large bowl.  Add rest of salad ingredients and mix gently.  

Combine all vinaigrette ingredients except oil in blender.  Add oil in a fine stream, blending until well mixed.    Add vinaigrette to pasta and toss gently.  Chill until serving time.  Serves 6-8.

Saturday, July 20, 2013

Lemony Lemon Bars


Ok, I have taken a long hiatus.  Life got crazy and then I just didn't know if the time it takes to post was worth it and if it was helpful to anyone.  I do like to share with you the beautiful quilts I find and the yummy recipes I like, so let me know if you find it worthwhile.  Last night I was mentioning to one of my sons how long it has been since I have posted and he replied, "That's pathetic."  Haha.  I don't want to be pathetic, so here I am again!

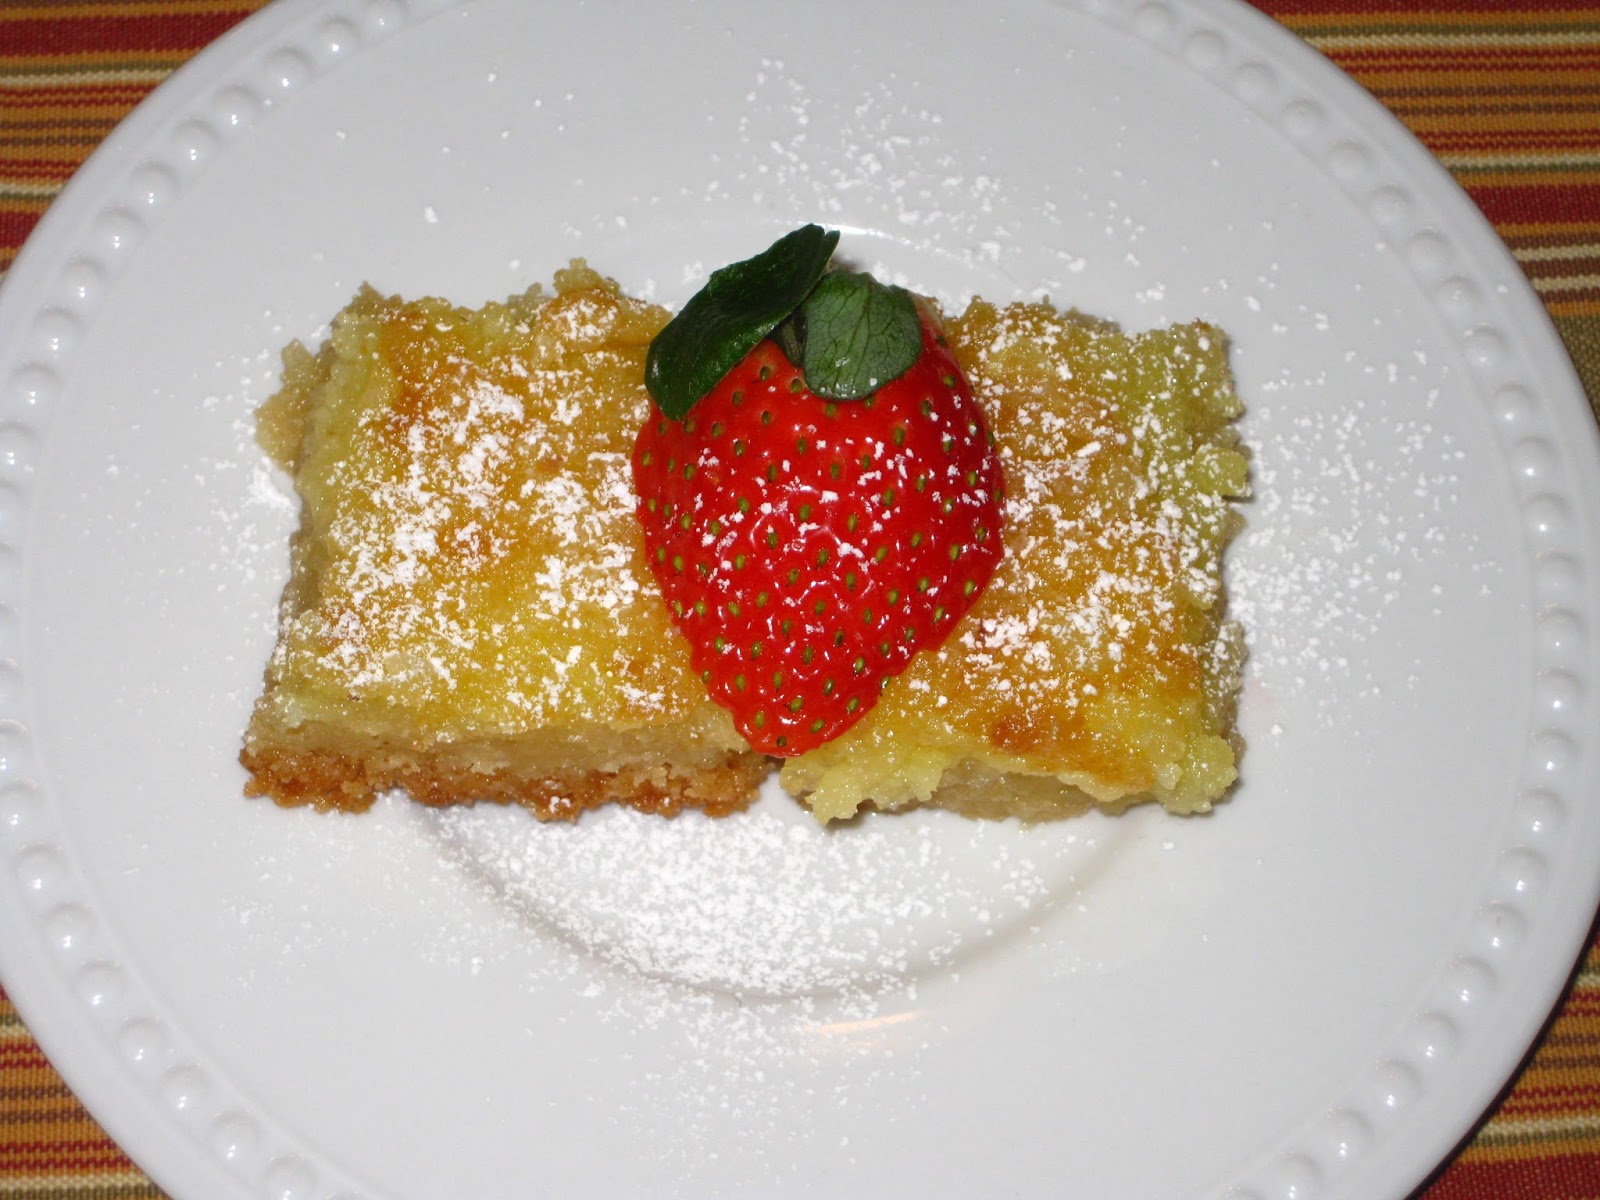
I thought I would share my Lemon Bar recipe.  Be warned, this is a LEMON bar!  No wimpy "Is this lemon?" taste here.  I love lemon and I just couldn't find a recipe that had a really good lemon flavor with a delicate crust, so I started experimenting a few months ago.  I tried all sorts of recipes but couldn't find one that was just perfect.  Then I started to combine them to get a good lemon flavor in the filling with a crust that just melts in your mouth.  It took a while, but this is what I came up with - and I really like it.

I use a large food processor which makes it fast to mix the ingredients.  If you don't have one, you could use a stand or hand mixer or even a fork to mix the crust into small pieces.  I use parchment paper to line the pan.  I find it very easy to take out of the pan and cut them.  You don't have to line the pan, but it really is a slick method.  So all you lemon lovers - Enjoy!


Lemony Lemon Bars         


Crust:                                                 Filling:
1-1/2 c flour                                       zest of 2 large lemons
2/3 c powdered sugar                         2-1/2 c sugar
3 Tbsp cornstarch                              1 c butter ( 2 sticks)
½ tsp salt                                           8 eggs
¾ c butter (1-1/2 sticks)                      4 Tbsp + 1 tsp cornstarch
                                                         ½ tsp salt
                                                         ¾ c juice of lemons (3-4 lemons)  
                                                             
Pre-heat oven to 350° F.  For the crust, blend flour, powdered sugar, cornstarch & salt in a food processor.  Add butter cut into slices & pulse till the mixture is fine.  Butter the bottom of a 9” x 13” pan.  Line pan with parchment paper with the paper coming up over the sides like a sling.  Place another piece going the opposite direction with the paper coming just above the sides.  Press the paper into the corners.  This will help to remove the bars from the pan.   Pour the crust into the pan and press evenly across the bottom & 1/2" up the sides.  Bake at 350° for 20-25 minutes or until lightly browned.

In the meantime, prepare the filling in the food processor.  Add zest, sugar and butter to the work bowl.  Pulse until well combined.  Add eggs, cornstarch & salt.  Pulse until combined.  Add juice of the lemons.  Pulse until combined.  Pour onto hot crust & reduce oven to 325° F.  Bake for 40-45 minutes or until filling is set when lightly jiggled & top is starting to get light brown.  Let pan cool completely on rack or in the fridge. 

Using the parchment paper, gently lift the bars from the pan to a cutting board.  Cut into squares and use a fine sieve to sprinkle top with powdered sugar.  Add a raspberry or half a strawberry on the top as garnish if desired.

Monday, February 18, 2013

Granny's Banana Bread

 
We really like quick breads at our house.  I had been using a favorite Banana Bread recipe for years that we really liked, but when I was going through my mom's recipes I found this one.  It was just like the one I had been using, except my mom's used butter instead of shortening.  So I tried it.  Yup.  It was the winner.  Using butter instead of shortening added that little extra flavor that was delicious.  My hubby purposely lets some bananas get over-ripe so I will make banana bread.  You want the bananas over-ripe so they will give the bread a really good banana flavor.  You can freeze banana bread if you wrap it tightly in plastic wrap then in foil after it is cool.  Use within 3 months.  Unwrap and let thaw at room temperature.  But we can't help but eat it when it comes out of the oven.  Enjoy!


Banana Bread
           1 ½ c sugar                                                          2 c flour, sifted                                 
            ½ c butter                                                            1 tsp soda
            2 eggs                                                                 ½ tsp salt
            1 tsp vanilla                                                         ½ c walnuts or pecans (opt)          
            4 over-ripe bananas, mashed

In mixer bowl, cream sugar & butter.  Add eggs, vanilla & bananas & mix well.  Add dry ingredients & mix just until combined.  Pour into 1 large or 2 medium well greased loaf pans.  Bake at 350° for 45-60 minutes until toothpick comes out clean.  Cool in pan for 5 minutes then remove & cool on cookie rack.

Option:  Cinnamon Swirl Banana Bread:  In a small bowl, mix together 1/4 c sugar and 2 tsp cinnamon.  Pour down the middle of the batter in the loaf pan before cooking.  Swirl into batter with a knife, but don't over-mix.  Cook according to directions.

Monday, January 28, 2013

Log Cabin Heart Quilt Pattern

Make a Log Cabin Heart pillow, table runner or wall hanging for Valentine's Day!  This pattern is so cute and easy and you can use your scraps for the heart.   Enjoy!


Go to the "Quilt Block Tutorials" for the Log Cabin Block Design.  You will find instructions for making log cabin blocks and courthouse step blocks.   http://www.quiltingandfood.blogspot.com/2013/01/tutorial-for-log-cabin-courthouse-step.html

Then follow the simple instructions to make your Valentine's Heart.


Supply List for Pillow:
1-5/8 yd dark red for border & back
1/8 yd dark pink for border
Assortment of 1-1/8” white strips
Assortment of 1-1/8” dark red strips
14” square pillow form
Six 7/8” or larger buttons

Assembly:
A.  Starting with a 1-1/8” red square, make (2) 13 piece Log Cabin blocks.
B.  Starting with (3) 1-1/8” white squares, make 2 Courthouse Steps with variation of only 12 pieces as shown in picture above.
C.  Sew the 4 blocks together as shown in picture to make heart.
D.  Sew 1-1/8” white strips around the block.
E.  Sew 1-3/4” dark red strips on each side of heart block.
F.  Sew 2-1/2” dark red strips on top & bottom of heart block.
G.  Sew 2-1/2 “ pink strips on the sides of heart block.
H.  Sew 6-1/2” dark red strips on the sides of the pink strips.
I..  Cut the back piece the same size as the top & sew RST (right sides together) on top & bottom.  Turn right side out.
J.  Press raw edges under ¼”.  Fold over 3/8” to inside & hem.  Fold & press under another 2” to finish edge.
K.  Insert pillow form & sew 3 buttons on each side with pearl floss & tie in square knot to finish.


Variations:

Table Runner:
Follow instructions for pillow A-D.  For table runner approximately 17” x 43”, make 3 hearts.  Sew a 1-3/4” strip of dark red sashing between the hearts to connect them.  Sew a 1-3/4” strip of the same dark red sashing on the top & bottom and then on each end.  Sew a 3-3/4” border of contrasting red on the top & bottom and then on each end.  Quilt & bind as desired.

Wall Hanging:
Follow instructions for pillow A-D.  For wall hanging approximately 28” x 31”, make 4 hearts.  Sew a 1-3/4” strip of dark red sashing between 2 hearts to make 2 sets.  Sew a 1-3/4” strip of the same dark red sashing between the 2 sets to make one row on top of the other.  Sew another 1-3/4” strip of the same dark red sashing on each side and then on the top and bottom.  Sew a 3-3/4” border of contrasting red on each side and then on the top and bottom.  Quilt & bind as desired.

Tutorial for Log Cabin & Courthouse Step Quilt Block Design

I love the Log Cabin block!  It is an often-used and very versatile traditional quilt block.  The Courthouse Step block is a variation of the Log Cabin block.   Depending on color value placement, the Log Cabin block can be used as a 1/2 square triangle in quilt designs.  The Courthouse Step block can be used as a 1/4 square triangle in quilt designs.  Use darks & lights in fabric placement or your 1/4 or 1/2 square triangles will be lost.  Which ever value you start with in the center square will be the dominant value in the block.  Traditionally, these blocks were used in scrappy quilts and the center fabric was red, representing the hearth at the center of the home.

These instructions give you the option of making finished blocks from 2-1/2" to 12-1/4" in size.  Both Log Cabin & Courthouse Step blocks can be made in 9 or 13 pieces.  Choose the finished size block in either the 9 or 13 piece column.  Cut the strips the width found in the left hand column to make your finished size block.  Follow the instructions for the block assembly.  The instructions can be used for chain sewing (sewing multiple blocks at a time) which saves lots of time!  

(To make these instructions large enough to read in my limited computer knowledge - I had to stretch them - which made them a little blurry.  Hope you can still read them!)

Wednesday, January 16, 2013

Italian Pasta & Bean Soup

I originally found this recipe in a "Cooking Light" recipe book and made a few changes.  It is chuck full of veggies and beans that are good for you and it has a wonderful flavor!  You can use whatever pasta you want - I had farfalle on hand so I used that.  It doesn't have a lot of pasta in it so you could add a little more if you want or leave it out all together.  The star of this soup is the mixture of spices with the beans & veggies.  It has become one of our favorite soups.  Just don't tell anyone it is good for them.  Enjoy!


          2 tsp olive oil                                              1-14-oz can chicken broth
          1 c finely chopped or shredded carrot        1-14.5-oz can Italian-style diced tomatoes
          ½ c finely chopped onion                            ½ c uncooked penne pasta
          1 garlic clove, minced                                 1-15-oz can cannelloni or other white
          ½ tsp dried oregano                                                bean, rinsed and drained
          ¼ tsp salt                                                    2 c fresh spinach
          ¼ tsp freshly ground black pepper             ¼ c grated fresh Parmesan cheese


Heat oil in medium saucepan over medium-high heat.  Add carrot, onion and garlic.  Sauté 5 minutes.  Add oregano, salt, pepper, broth and tomatoes; bring to boil.  Cover and reduce heat.  Simmer 10 minutes.
 
Increase heat to medium-high.  Add pasta and beans; cook 12 minutes or until pasta is almost done, stirring occasionally.  Stir in spinach and cook until pasta is done and spinach is wilted, about 2 more minutes.  Sprinkle each serving with cheese.  Serves 4.  Can double recipe.

Monday, December 31, 2012

Danish Wassail

Mmmm.. Danish Wassail.  My mom would make this during the holidays and the house would smell absolutely wonderful.  Her New Year's Day buffet would always offer this wassail along with a delicious cold beverage.  This citrusy hot drink will warm up the coldest days.  

There are lots of different versions of wassail.  This version is my favorite.  It has four spices which many other don't & the combination is not only aromatic, but also delicious.  I used fresh ginger since it was what I had on hand.  Usually I use crystallized ginger.


Danish Wassail

         4 c water                                         juice of 6 lemons OR 6 oz (3/4 c) frozen lemonade
         2 c sugar                                               concentrate
         3 sticks cinnamon                          juice of 10 oranges OR 1-12 oz can frozen orange                           12 whole cloves                                      juice concentrate
         6 allspice berries                            8 c apple cider
        1 piece ginger (crystallized or         lemon slices (opt)
               small fresh peeled piece)


In large stock pan, bring water & sugar to a boil.  Tie spices in cheese cloth, put in sugar water & simmer for 1 hour.  Remove spice bag.  Add juices & garnish with lemon slices.  Serve hot.


Base an be kept in refrigerator & juices added as needed.   
Variation:  Cranberry juice or apricot nectar can be used instead of cider.
 

Wednesday, December 26, 2012

Jalapeño Popper Appetizer


This appetizer has the delicious taste of the stuffed jalapeno poppers in an easy to make dip/spread.  If you want to increase the hotness, add more of the jalapeno peppers.  I like to bake it rather than microwave it, unless I am just re-heating it.  The oven toasts the bread crumbs that give it a nice crunch.  You can make this a day or two before and refrigerate, then just pop it in the oven to heat.    Enjoy!


         2-8 oz pkg cream cheese, softened               2 oz can diced jalapeño peppers, drained

         1 c mayonnaise                                              1 c grated Parmesan cheese

         4 oz can chopped green chilies, drained        ½ c bread crumbs


Mix cream cheese and mayo in large bowl until smooth.  Stir in green chilies, jalapeño peppers and Parmesan cheese.  Pour into 8” x 8” dish and sprinkle top with bread crumbs.  Bake at 375° for about 30 minutes till bubbly & light brown or microwave on high until hot, about 3 minutes.  Serve with toasted French bread slices, toasted baguette slices or pita chips.

Saturday, December 8, 2012

Granny's Shrimp Cocktail

You've probably noticed that some of my favorite recipes are from my mom.  During the holidays my mom made a lot of delicious food and loved to entertain.  So when the holidays come around I long for the wonderful foods she used to make.  This is a tasty appetizer she would make throughout the holidays.  These are even the glasses she would use.  (I miss her.)  You actually drink it and no utensils are needed which makes it convenient when guests are socializing and not sitting down.  It is easy to make and since you make it a day ahead, it is a perfect recipe for entertaining.  Oh, and it's not even loaded with fat.  Enjoy!


Granny's Shrimp Cocktail
            2 qts tomato juice (8 c)                                1 large green pepper, diced
            2-12 oz bottle shrimp cocktail sauce              2 green onions, diced
            2 c fresh salad shrimp                                  ½ c sugar
            4 c celery, diced small                                 1/3 c fresh lemon juice
            2 Tbsp horseradish                                      ¾ tsp garlic salt
            3 Tbsp white wine vinegar                             2 Tsp Worchestershire sauce

Mix together in large bowl or pitcher.  Add salt & pepper to taste if desired.  Chill 24 hours.  Serve in small cups.  Makes about 36-1/2 c servings.  You can cut recipe in half.

Monday, December 3, 2012

Granny's Orange Rolls


I'm sharing my mom's signature recipe:  Orange Rolls!  Her breads were always delicious and the grandkids didn't leave her house without a loaf.   With our boys - that loaf was usually gone before we got home.   Her orange rolls were the epitome of her scrumptious breads.  Ask anyone in the family what their favorite bread of granny's is and the answer will be Orange Rolls!  These do take some time to make (most of it waiting time), but they are well worth it.  Double the recipe and freeze some to use later.


After mixing the yeast mixture, milk mixture (I actually use water because my hubby is lactose intolerant-and it's still delicious) eggs & 1 cup flour, cover & let rise till bubbly.  It only takes 15 to 20 minutes.


 Gradually add the rest of the flour & mix until the dough is smooth - 3 to 5 minutes.  It is a soft dough and should still stick to the sides of the bowl.


 Let rise until double.


Mix the orange rind, sugar & softened butter together.  Mmmm.


Put dough on a floured surface.  It is a soft, sticky dough so keep the flour handy.  Roll out in a rectangle, about 7-8" tall.  Spread the orange butter within 3/4" of the edges.


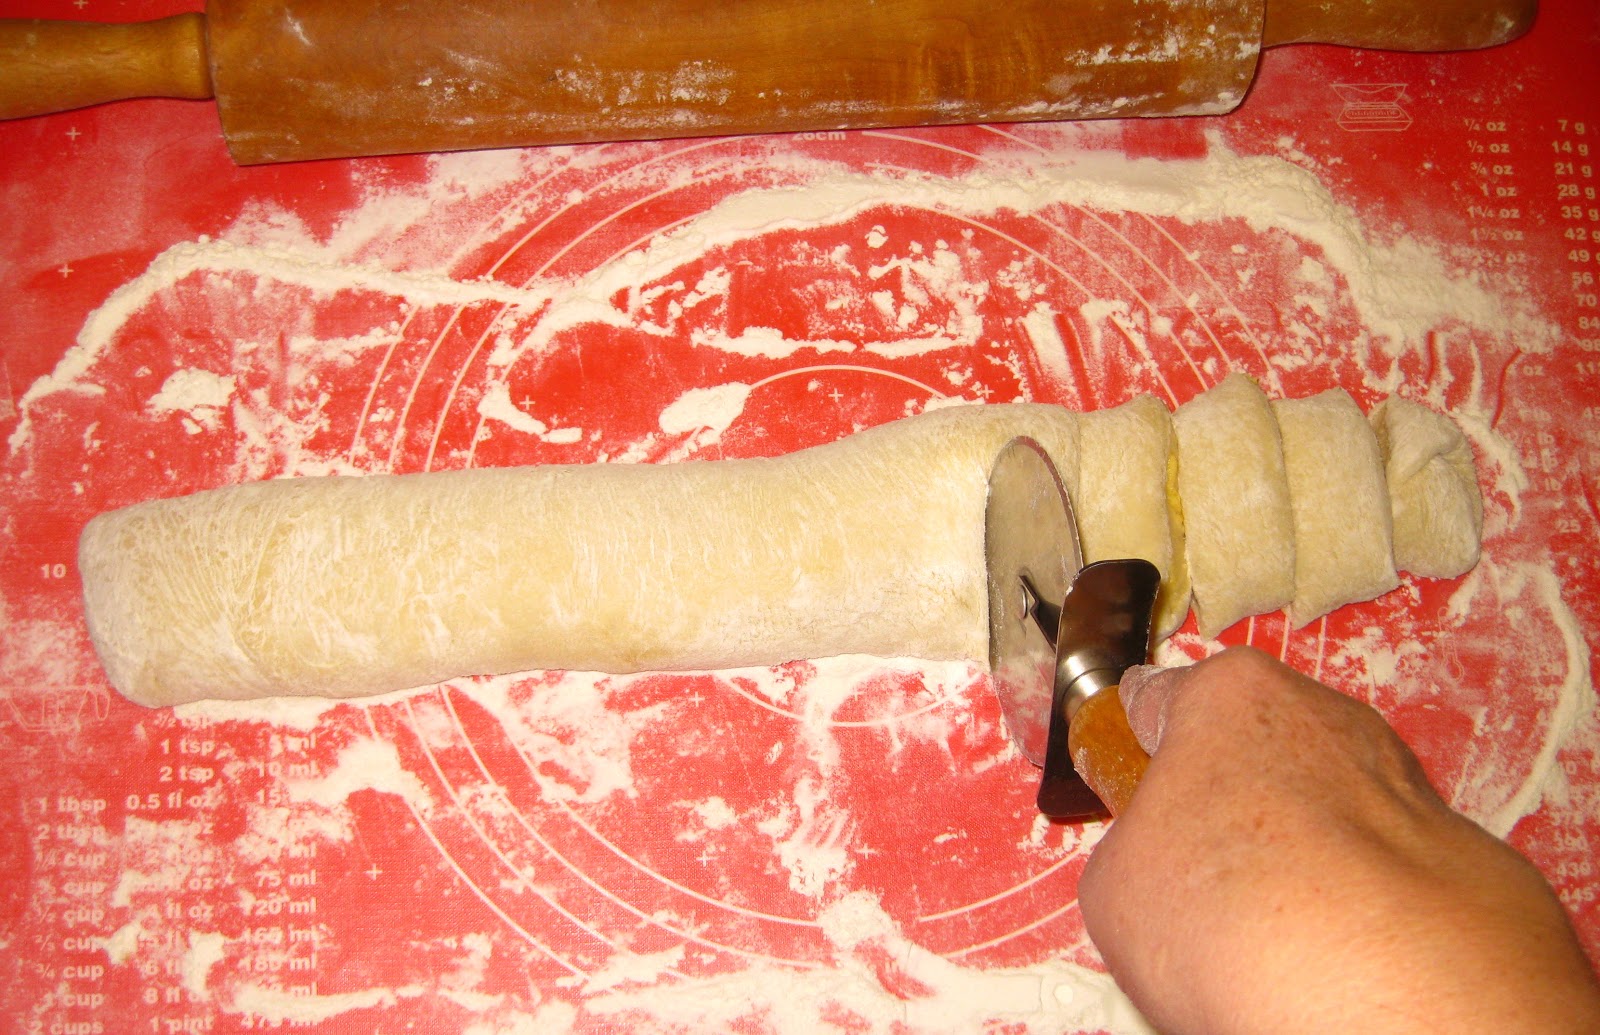
Roll up lengthwise & cut in 1" slices.  Using a large pizza cutter makes cutting fast & easy.


Place on greased or parchment lined baking pan.  Traditionally orange rolls are placed in muffin tins.  I think my mom finally gave up on that because as the family grew, she didn't have enough muffin tins.  If you do use muffin tins, you may have to cut them smaller because you don't want to fill the tin more than 2/3 full before raising.  You can freeze at this point.  Let rise till double then bake until light brown.  Mix glaze & spread on rolls while warm.  Yum!!!!  Enjoy!


Granny’s Orange Rolls
1 Tbsp dry yeast                                          5 Tbs butter, softened
1 tsp sugar                                                   1/3 c sugar
¼ c warm water                                            grated rind from 1 orange
             1 c milk                                                          
             1 Tbsp butter                                                Orange Glaze:
             ½ c sugar                                                     1 Tbsp butter, melted
             ½ tsp salt                                                      2 Tbsp fresh orange juice
             3 eggs, beaten                                              1 tsp grated rind from orange
             4 c flour                                                        1 c powdered sugar                                            

In small bowl, dissolve yeast &1 tsp sugar in warm water.  In small pan, heat milk, 1 Tbsp butter, sugar and salt until butter is melted.  Cool to lukewarm.  In mixer beat eggs, 1 c flour, yeast mixture & milk mixture.  Cover & let rise until bubbly – 15 to 20 minutes.

Gradually add remaining flour and beat well for 3-5 minutes until dough is smooth.  Cover & let rise until double (1 to 1-1/2 hours). 

In small bowl, mix softened butter, sugar & orange rind.  Roll dough into rectangle only about 7 or 8 inches tall & 1/4'” thick.  Spread with orange butter mixture within 3/4" of edges. Roll lengthwise like cinnamon rolls.  Cut in slices 1“ thick.  Place on greased or parchment lined baking sheets or in greased muffin tins.  If using muffin tins, do not fill more than 2/3 so you may have to slice thinner.  (At this point you can freeze until solid – about 2-3 hours.  Remove from pan and put in freezer zip-lock bags until ready to use.  Use within 3 months.  Place on greased or parchment lined pans and cover until they have thawed and rised until double before cooking - about 3-4 hours.)  Cover and rise until double- about 1 to 1-1/2 hours.  Bake at 375° F. for 15-20 minutes or until light brown. 

Mix Orange Glaze ingredients together in small bowl.  Frost rolls while warm.  Makes about 1-1/2 dozen.  You can double this recipe. 

Saturday, November 24, 2012

Classic Turkey Soup

Don't throw out your turkey carcass!  Homemade turkey soup is so good (and healthy!)  This is a classic recipe and you can make changes for your preferences.  Throw in different vegetables if you want, choose which starch you like best.  The spices blend wonderfully and you'll never get a taste like this out of a can!  Also, this soup is cost effective and makes a lot!  Enjoy!


Classic Turkey Soup
            1 turkey carcass                                          1 tsp dried parsley
            4 qts water (16 cups)                                   1 tsp dried basil
            3 fresh sage leaves                                     1 bay leaf
            6 large carrots, sliced                                  ¼ tsp black pepper
            3 stalks celery, sliced                                   ¼ tsp paprika
            1 onion, diced                                              1/2  tsp poultry seasoning
            1 Tbsp Worcestershire sauce                      2 c frozen petite peas         
            1-1/2 tsp salt                                                choice of 1 c rice, barley, potatoes, orzo, 
            ¼ tsp dried thyme                                              quinoa, noodles, or dumplings

Place turkey carcass into large pot & pour in water.  Add sage leaves.  Bring to a boil, reduce heat to a simmer, cover & cook for about 1 hour.  (Use foil to cover if lid won't fit.)  Remove carcass & chop any remaining turkey meat.

Strain broth through a strainer into a large bowl.  Put strained broth back in pot.  Add chopped turkey to broth.  Stir in rest of ingredients except peas, noodles or dumplings.  (Rice, barley, potatoes, orzo or quinoa are added at this point.)  Simmer until vegetables are crisp tender – about 20-30 more minutes.  Add peas and noodles or dumplings (if using).  Cover & cook 10 – 15 minutes until peas are hot and noodles or dumplings are cooked.  Remove bay leaf.  Add salt & pepper to taste & serve.